Welcome to my
Perfectly Imperfect Life..........
Showing posts with label tutorial. Show all posts

Saturday, April 8, 2023

Upcycled Electric Candle Sticks


 For those of you who follow me, you know I'm decluttering everything.
Just take a look at my Etsy Shop! LOL
 
 I found a couple of electric Dusk to dawn candlesticks 
and was ready to donate them. 
Have had them for years, 
don't even remember where I got them from.

http://

Then a light bulb went off,
 as it sometimes does,
 but I never find the time to actually act on it! 
But I made time for these.

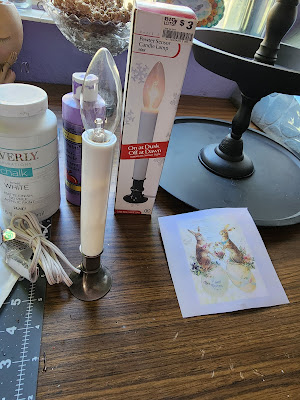
I gathered what supplies I thought I would need:
the candlestick, paint, 
an image found on line (deciding on an Easter Bunny), 
and glue


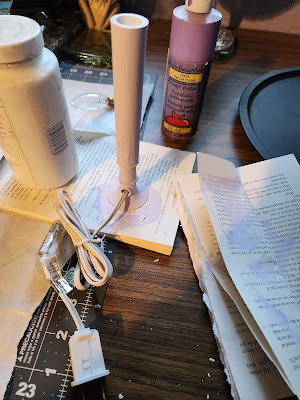
I painted the stick with white chalk paint,
 in case any of it would end up showing.


Mixed purple and white paint to make more of a 
pastel shade and painted the base.

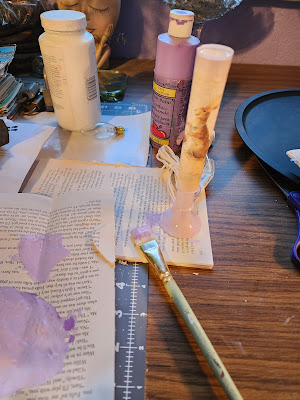
Roughly measured the image to cut it to fit.
 and glued in on the candle stick.


It comes on at dusk and turns off in the morning


The other one I used a Mermaid image on for my bedroom


A cute and quick little craft

Monday, April 3, 2023

Quick and Easy Mini Easter Buckets


Darling Easter buckets that can be filled with whatever you like, candies, candles, a plant, etc.  Perfect for hiding with special prizes for your Easter Egg Hunt, favors, gifts, décor and more.

I picked these little metal buckets up at different garage sales.
Brought them home and washed them up. 


I then went on-line to look for Easter images 
I liked and printed several different ones out.


Cut them out.


Glued them on with white glue which I already had.


Held for a few mins for the image to adhere


There you have it, simple, quick and easy!
They would be cute as whatever you decide to use them for.


Saturday, April 1, 2023

Growing and Crafting with Herbs


Fragrant Herbs

Growing herbs is easy and fun.


Here are some tips for growing and simple ways to use or

preserve your homegrown herbs.

Rosemary

Rosemary is a shrub with fragrant evergreen needle like leaves and will bloom blue flowers along the stems.

Rosemary is best planted in the spring and likes to grow in a sunny spot. A well draining sandy or loamy soil is best. Rosemary is drought tolerant when established.


There are a quite of different ways to use Rosemary. Such as making potpourri, a wreath, add to a floral spray, drink in tea, cooking and more.


*Tip* Make a brush with fresh Rosemary sprigs by tying the ends. Use to add sauce to meat while barbequing. You'll not only brushing on your sauce/marinade but adding Rosemary flavor also.


Lemon Verbena

Lemon Verbena is a flowering shrub with sprawling branches. Lemon Verbena prefers warm weather. Plant your Lemon Verbena in the spring in fertile soil. 


The fragrant slender leaves can be used in a variety of ways. The strong lemony scent bodes well in herbal sachets, bath bombs, soaps and cooking.


Bay Tree

The Bay Tree has large, pointed oval leaves that are deep, glossy green. Plants prefer partial shade but will tolerate full sun. The Bay prefers average garden soil.


Having pliable branches Bays are perfect for making wreaths, swags, even crowns. 


*TIP* Bay trees are easily propagated. Bay Tree propagation begins by taking cuttings, do this in summer when the wood is green and pliable. Take three or so cuttings at least 6'' long. You want the cutting to be firm but the wood should be easy to bend. Strip off all leaves from each cutting except the top two or three. Dip stems in rooting hormone and place in small pots. within a couple of months you should have rooted cuttings. Give them an easy tug, if you feel resistance you have roots!


Sage

Grow sage in the mild weather of spring or fall in well draining soil with lots of sunlight. 


Easily repel mosquitoes by tossing a few sage branches into your outdoor fire. They make excellent smudge bundles, wreaths, herbal sachets, place down the center of your dining table for a fragrant centerpiece base, soaps, decorate candles and more.


*TIP* Herbs are easy to grow. Most like full to partial sun, Semi-moist soil (meaning they can dry out between watering's), and they like to be trimmed. Trimming not only makes them more compact, but gives you trimmings to cook with.


Mint


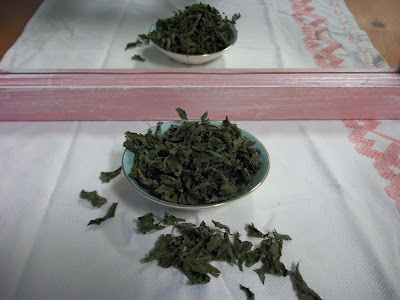
Mint plants grow quickly and should be planted in the spring in a damp, moist area with well-draining soil. Mint likes a spot that's in either full sun or part shade. Its small white or purple summer blooming flowers attract bees, butterflies, and other pollinators.


Mint makes for very fresh and stimulating bath teas, herbal swags, candles, and soaps. dried and crumbled on your carpet, then vacuumed up yields a fresh scented room.


*TIP* Mint loves to spread! Before you know it you will have a good patch of mint. To keep it in bounds, plant in a container to contain roots. Be sure to pinch off any flower buds you see. If you let them flower, seeds will form which is another way they sprout and spread easily.


Growing herbs gives you such a variety of ways to use in home décor and crafts.
Should you not be lucky enough to have an herb garden,
I do have several varieties in my Etsy Shop.


Saturday, October 22, 2022

Faux Vintage Leather Binder


I needed someplace to keep all my research papers, so I bought a huge binder.
Everything was perfect except for the cover, stark white.
Well, that just won't do!

I decided I wanted it to look like old vintage leather.
Grabbed some supplies and went to work.


Here we go!

I started by striping the white tissue paper,


then scrunching it all up to get a nice wrinkly effect.


I tore the tissue paper into smaller pieces, which made then easier to adhere.


Working a section at a time, I covered the outside of the plastic covered binder
with a coat of Mod Podge and added pieces of the tissue paper. There's no right
 or wrong way. You want it to look wrinkly so no worries about smoothing it out.


I applied another coat of Mod Podge over the tissue paper.

Here's what the front looks like when done.
I repeated the same process to the sides and back of the binder 
allowing for drying time in between coats.


Once the entire outside was covered with tissue it was time to paint.
I gave it a coat of Burnt Umber craft paint because it's what I had on hand. 


I wanted some dimension so I added a few drops of Black craft paint. 


While the Burnt Umber was still wet I swirled in the black randomly


I kept swirling until I reached the effect I wanted.


Here's what the front looks like when done with the painting.


I repeated the same treatment to each of the outside sections, 
allowing each to dry properly before moving on to the next section.


Once I was sure the outside was thoroughly dried, I started working on the inside.
I wanted the inside to look finished. It has 3 pockets on the inside front and back cover. 
I didn't want to lose the ability of using those.

I brought the tissue paper and paint combo inside to frame the binders edges for a 
framed look. Found an image I liked, printed it out and slid it into the top pocket.


Being able to see through the pockets gave me the advantage of cutting the
image where I needed to so I could apply the correct size to cover the top of the pockets.


After cutting the image (I used my craft knife), I removed each piece.
I adhered each image to the top of their correct pocket, making the pockets still useable 
with a finished look. 


After a thorough drying time I made sure the pockets worked as anticipated.
And they did.


I repeated the same process to the other side, 
continued the theme down the inside of the "binding" 
and added some small images to the narrow part of the "binding". 


I happened to find a small bit of black trim and 
decided to add along the inside bottom.
Thought it looked cute and I used that small piece of trim
 I had been hanging onto forever!


Once the inside was completely dry I moved on to embellish the cover.
The fun begins!

I mixed some Mod Podge with a little bit of  brown craft paint.
I used this tinted Mod Podge to adhere cheesecloth to the outside cover.
I stretched the cheesecloth until it kind of looked like netting.


I let it reach beyond the edge of the binder and once it was dry, 
I just trimmed it to fit with scissors.


I found a piece of black ribbon with gold stars and added it to the "binding".
A perfect fit, yay another remnant gone!
I took brads I found and cut off the prongs.
I adhered the tops along the ribbon to make them resemble
 rivets or something to that effect.


I added some swirly die cuts to look like "hinges"
and a few images that I had to the front.


I added clay trim, that I painted black, and a piece of burlap
at the bottom, then topped with old keys.


It took me about a month to finish this -
a lot of the time was in the drying, and I only was able to 
work on it when I had the time. Which was few and far between.

I'm sure it would go faster when a person had ample time to
work on it regularly.

Here is the finished product along with another I made.


More here

Thursday, August 18, 2022

Dishcloths to Crochet ~ Patterns


Enlarge and print out

~
~

Sweet Strawberry


~

Cute Cosmos


~

Organic Orange


~

More here

.

.
Blog Widget by LinkWithin