Welcome to my
Perfectly Imperfect Life..........
Showing posts with label Makeover. Show all posts

Saturday, April 8, 2023

Upcycled Electric Candle Sticks


 For those of you who follow me, you know I'm decluttering everything.
Just take a look at my Etsy Shop! LOL
 
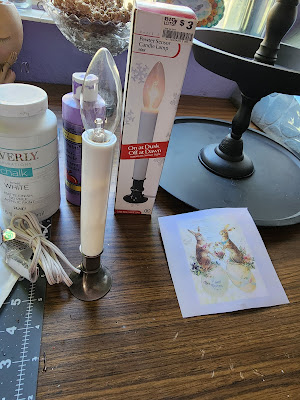
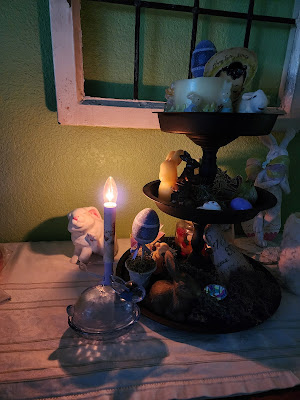
 I found a couple of electric Dusk to dawn candlesticks 
and was ready to donate them. 
Have had them for years, 
don't even remember where I got them from.

http://

Then a light bulb went off,
 as it sometimes does,
 but I never find the time to actually act on it! 
But I made time for these.

I gathered what supplies I thought I would need:
the candlestick, paint, 
an image found on line (deciding on an Easter Bunny), 
and glue


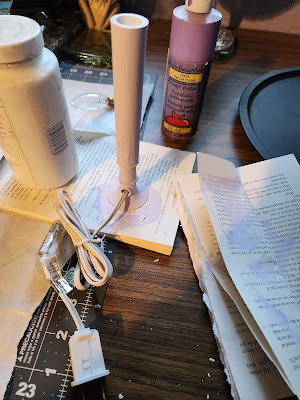
I painted the stick with white chalk paint,
 in case any of it would end up showing.


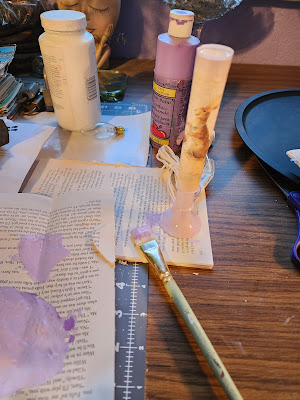
Mixed purple and white paint to make more of a 
pastel shade and painted the base.

Roughly measured the image to cut it to fit.
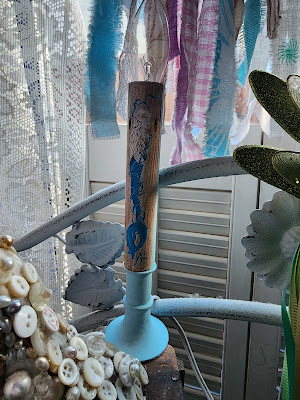
 and glued in on the candle stick.


It comes on at dusk and turns off in the morning


The other one I used a Mermaid image on for my bedroom


A cute and quick little craft

Monday, April 3, 2023

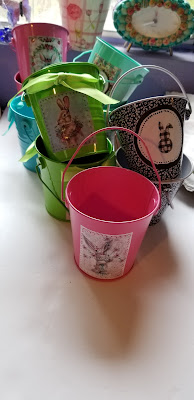
Quick and Easy Mini Easter Buckets


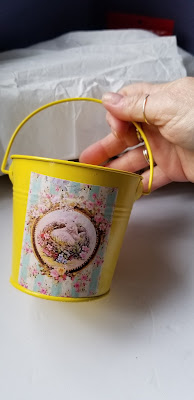
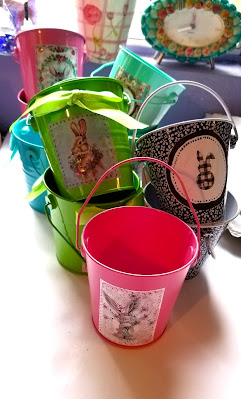
Darling Easter buckets that can be filled with whatever you like, candies, candles, a plant, etc.  Perfect for hiding with special prizes for your Easter Egg Hunt, favors, gifts, décor and more.

I picked these little metal buckets up at different garage sales.
Brought them home and washed them up. 


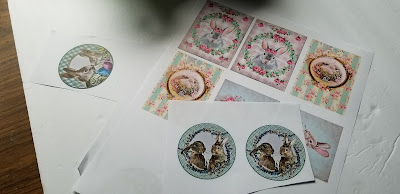
I then went on-line to look for Easter images 
I liked and printed several different ones out.


Cut them out.


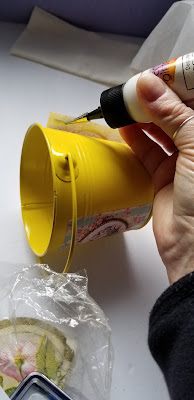
Glued them on with white glue which I already had.


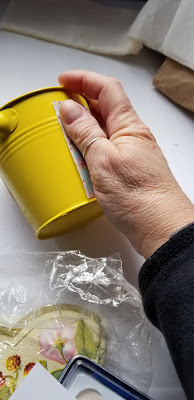
Held for a few mins for the image to adhere


There you have it, simple, quick and easy!
They would be cute as whatever you decide to use them for.


Thursday, September 29, 2022

Plain Jane Table to Bright and Beautiful


All the projects I had planned on doing this Summer were delayed by the above three!
Our house had become so quiet, losing 2 of our cats ages 20 and 22, one last December and the other this March. Then very unexpectedly, losing our American Staffordshire, 9, just a month later.
 
Not sure what I was thinking rescuing 3 puppies! I usually rescue around a year old.
All 3 within a month's time! A little black and white Terrier mix, a brindle unknown (vet won't even hazard a guess!) and a Corgi.
What a handful. I have more baby gates up now than I ever did with any of my kids! 

Anyway I digress, my oldest son had bought new furniture, the old was being sent to the dumps ~ but not before I got a look!!  Grabbed a recliner, the table above, a large bench and a personal refrigerator.  All but the refrigerator need some love, ie projects.

I started with the table in the above photo.
 It was all white with crayon and marker accents ;)
I had taken before photos but I changed carriers, buying a new phone and there go my photos  GRRR  Completely forgot I hadn't retrieved them.

I tightened all the wobbly joints to make it solid again.
I painted the legs with Hello Hobby Chalk Paint in aqua.
I've never used Unicorn Spit and really wanted to try it.
Figured the top of this rescued piece would be perfect.


I taped newspaper all the way around the edges to protect the Chalk Paint.
 I used Zia Teal, Purple Hill Majesty and White Ning Unicorn Spit.
Not sure what I was doing, I squirted some on and used my fingers to swirl it around. 
Wasn't too crazy about the swirls, so I "played" a bit and ended up making lines then blended the colors so they weren't so definite. I had a bowl of water nearby to dip my fingers in when needed to help move and blend the colors.


once it was dry I painted the edges with black craft paint.

The whole time I worked on this table I kept feeling like I was being watched.
Finally figured out who had their eyes on me ~~


I'm sure they thought they were going to be fed.


Once everything was thoroughly dry, I put 3 coats of  Marine Spar Varnish over the Unicorn Spit.  I wanted it to be protected well, my younger son would be using it.


I used a sponge brush to apply the Varnish, I wanted to be able to toss it when I was done. 
I found that the sponge would make bubbles in the Varnish.
Once the whole top was covered in Varnish, I found if I went over it with the side of the sponge brush it didn't leave any bubbles.

I then applied a clear Wax over the Chalk Paint.


 It was fun using the Unicorn Spit.
I really like the way it turned out.

The next project will be reupholstering the bench,
but that probably won't be until next Spring.
These puppies keep me hopping!

more here

Tuesday, July 19, 2022

Cement Tray to Succulent Planter


What do you do with your Dad's old cement trays?
I have several that have been floating around 
my garage for...a... more years than I care to admit.

Yes, I'm still working my way through my Treasure Pile from the farm!
Don't judge me! LOL
Life has been even more crazy and hectic this year, 
I swear it's 2021.2!

It's not all my fault, really.
My sister is purging...accck! 
She's purging my way...that means she's bringing 
me carloads upon carloads of stuff!

Don't get me wrong, I am NOT complaining!
It's a double edged sword - 
So fun to sort through her cast off Treasures,
but between my keep pile and Treasure pile,
 I need to get busy (like my time is mine, lately)
creating from my Treasure Pile and I need a bigger house for my keeps!
So I'm purging some of my things to make room for her "new" things.
Yes, it is crazy and it drives me nuts that I can't just 
wiggle my nose and get all the projects in my head done
 that I have for my Treasure Pile! 

Back to Dad's cement trays -


My Sister brought 2 small stands, from what I don't know,
but I put them to good use along with Dad's cement trays.

I decided to marry them into a succulent planter.


Dad's cement trays are, of course, old and well used.
I punched a few holes in the bottom for drainage.
Then sanded the bottom where the stand would be adhered 
to the stand trying to remove a bit of the leftover cement.

Yep, you guessed it, grabbed Dad's go to - JB Weld
A dab from the red tube and a dab from the black tube


Mix well.


I applied it to the stand


Centered the tray over the stand


and married.


I placed a jar in the center of the tray
to add some weight to be sure there was ample contact. 


I left it sit for 2 days, to be sure it had plenty of time to cure.


I tore a coffee filter in half 


and placed over the holes on the 
inside of the tray to prevent soil from falling through.


I used soil for Succulents


I had a few plants that needed to be transplanted.


Planted in their new home.


I topped the soil off with white gravel


added a few Agates I had.


She sent two stands, so I was able 
to make two of these.


Now what to do with the other 4 cement trays?
I have ideas, it may take a couple years for them 
to come to fruition, but I will eventually get there.


Love the way it turned out!



Monday, July 5, 2021

Upcycled Milk Bottles


My Son buys his milk in milk bottles.
The empties seem to always find there way to me with the phrase 
"Here Mom, You can do something with these great milk bottles",
Why he thinks they are great, I don't know. 
I think it reminds him of living in Miami and having a milkman deliver our milk.

It was fun at first, but when you have 50+, 
they become a headache or at least give me a headache! LOL  
I finally got around to decorating three -
Here's how I did it ~

The milk bottles have writing on them and wasn't sure how many 
coats of paint it would take to cover the non-removable writing.
I  decoupaged on torn pieces of white tissue paper. 
This not only covered the writing well, it added texture


Once covered, I let it sit overnight to dry thoroughly.


I added the plastic cap back on and painted it with white chalk paint.
I wanted an even colored background to work on.


This one I painted purple.


Again I let thoroughly dry overnight.


I chose the smoothest side for the front and 
decoupaged an image of a Mermaid's tail surrounding it with
 aqua, blue, rose copper glitter then again, blue.
I felt these colors coordinated with the Mermaid's Tail 
and added the sparkle I wanted.


Once the front was finished, I went crazy with all types of shells, 
pearls, even some beads.
I started a trail of these that encircled up and around the bottle - beginning and 


ending on each side.  


On the back I found a filigree medallion which
 I attached to an old doily circle and 
added a Starfish charm in the center.
I also used a bit of copper paint on my finger
 to add a touch along any large tissue paper wrinkles that showed.


I surrounded the neck with a wide band of all sizes, shapes and 
kinds of Shells that I had collected over the years,
 from Miami to Alaska.

I made a "bed" of dark midnight blue small glass beads
on the lid and added a large shell on top.

~ The finished product ~


Here are the 3 I made with this same basic technique.


These happen to be available in my Etsy Shop.


.

.
Blog Widget by LinkWithin