Welcome to my
Perfectly Imperfect Life..........
Showing posts with label easter. Show all posts

Saturday, April 8, 2023

Upcycled Electric Candle Sticks


 For those of you who follow me, you know I'm decluttering everything.
Just take a look at my Etsy Shop! LOL
 
 I found a couple of electric Dusk to dawn candlesticks 
and was ready to donate them. 
Have had them for years, 
don't even remember where I got them from.

http://

Then a light bulb went off,
 as it sometimes does,
 but I never find the time to actually act on it! 
But I made time for these.

I gathered what supplies I thought I would need:
the candlestick, paint, 
an image found on line (deciding on an Easter Bunny), 
and glue


I painted the stick with white chalk paint,
 in case any of it would end up showing.


Mixed purple and white paint to make more of a 
pastel shade and painted the base.

Roughly measured the image to cut it to fit.
 and glued in on the candle stick.


It comes on at dusk and turns off in the morning


The other one I used a Mermaid image on for my bedroom


A cute and quick little craft

Monday, April 3, 2023

Quick and Easy Mini Easter Buckets


Darling Easter buckets that can be filled with whatever you like, candies, candles, a plant, etc.  Perfect for hiding with special prizes for your Easter Egg Hunt, favors, gifts, décor and more.

I picked these little metal buckets up at different garage sales.
Brought them home and washed them up. 


I then went on-line to look for Easter images 
I liked and printed several different ones out.


Cut them out.


Glued them on with white glue which I already had.


Held for a few mins for the image to adhere


There you have it, simple, quick and easy!
They would be cute as whatever you decide to use them for.


Tuesday, March 24, 2020

Easter Activities from the TOYMAKER!


lots of fun crafts/activities for the kids from the Toymaker!

Enjoy ♥


Tuesday, March 17, 2020

Monday, March 16, 2020

Succulent Easter Favors


Spring/Easter always makes me feel like we have a new beginning, a new start. Everything is fresh, possibilities are endless.
I guess that's why I always like to send my Easter dinner
 guests home with a plant.
It just seems the right thing to do.

''To plant as garden is to believe in tomorrow''
Audrey Hepburn

Last year succulents were all the rage, heck they still are!
I knew that was the plant that was going home with them
 and I knew where I was going to get them. 
Vintage at the Yard takes place 4 times a year and
 is my favorite place to go and wander.  
It's an open air market in a beautiful lakeside setting 
with the most fabulous vendors. 
One of which is Star Succulent Nursery.
They have the healthiest, well priced succulents I've found.

Luckily there was an event just prior to Easter, 
I headed out to to grab the succulents I needed, 
and check everything else out ;)


Once home, I then needed to figure out how to make them "favor worthy".
I ended up choosing some squatty, quilted, and plain mason jars I had.
These were some of the supplies I had running though my brain.


I had thought about decoupaging the jars with that pretty hydrangea napkin but decided to paint the jars with chalk paint in Eastery colors instead.


Once dry, I transplanted the succulents into the jars, 
being sure to add some small rocks to the bottom for drainage.


Next I embellished them with good ol' Dollar Store 
ribbon I had. I always pick some up, just to have, 
especially when they get some new/different colors in. 
And this sheer pastel worked wonderfully!


I don't like the dirt showing, so I topped it off with
Spanish Moss, again something I keep on hand
 from the Dollar Tree.
I like the way it gives it a fished look.


I had leftover candy stick and Easter stickers from the previous year so I combined the two and stuck one in each jar for a little decoration.


Bim bam yes mam, they were ready to go!

Now to figure out what to make for this year 

Other posts you may be interested in

Monday, March 9, 2020

Making an Easter Book Bundle


I wanted to add an Easter Book Bundle to my Bunny Collection this year.
Being this my first Book Bundle, I was excited. I had never bothered to read the directions. It seemed pretty straight forward by just looking at the photos.  So this is my version, the way I made my bundle ~ I don't believe there is any right or wrong way ~ do it anyway you want, adjust here and there to make your bundle look how you want it to in the end ♥

Pressed for time, I was trying to speed through to at least get my Book Bundle started.
I always put the things I want to make for myself off to the last minute, 
do you do that too?

Ran to my stash to grab books.....
only to find I had used them all up for other projects - ugggghh!
Off to the Dollar Store I ran to grab some - *this is where I roll my eyes* -
Only to find out a few days later I missed the library sale on books - $1 a bag.

Too many family crisis' since January -
but I digress....

(Fun, it was my time for something fun, 
even if I was pressuring myself to have it!)


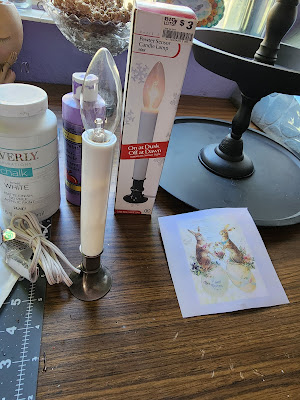
Had books, paint, brush.....
had seen some really cool font stamps online months earlier when I first thought of making this bundle.  I flipped through my usual sources online, saw the prices and decided I'd use my Dad's from WWII.  Nothing fancy, but they's get the job done and I could start immediately since I wouldn't have to wait for them to arrive or drive an hour to get them.

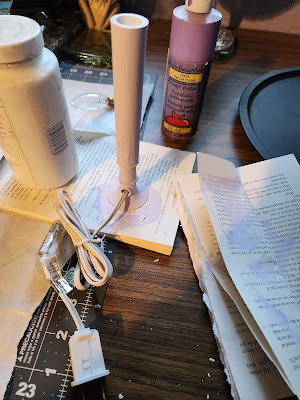
The covers of the books removed nicely


I just gently pulled and off they came in one piece


I did end up lightly sanding a few high spots of glue that remained on the spines

Ignore my table, several other projects going on

I wanted them to lay flat on top of each other.
Used regular Elmers to glue them together. 
Weighted them down and let set a day or two until I got back to them.


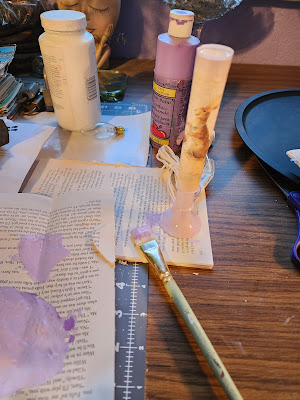
I wanted them a very light pink.
I add a few drops of Waverly's Chalk Paint in Ballet Slipper to Waverly's Chalk Paint in White and mixed.


The books were painted and left to dry


They even stand ;)


On to the stamping ~
It may have turned out a little wonky, but 
it's not everyday you get to use old stamps like these.

The Title is from Gene Autry's "Here Comes Peter Cottontail".
When I was little I couldn't remember all the words,
 so I sang the title over and over driving my family crazy.
I still have the old red record I used to listen to! 


Looking back, I think I just wanted to incorporate some of 
my childhood into my Easter lineup. 
If we could just turn the clock back 60 years
 instead of just an hour  


There was definitely a learning curve with these old wooden stamps.


I like the way they came out,
and I'm sure Dad would have liked that I finally used them!
Even the old ratty ink pad too!


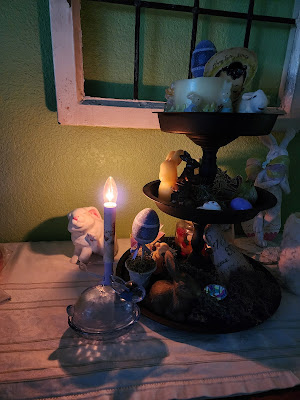
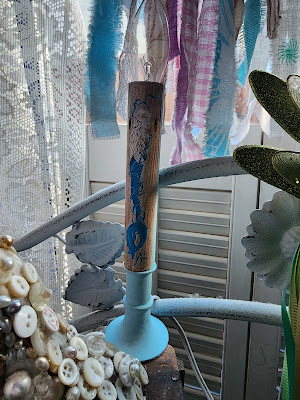
When done I decided to tie Spring Green ribbon around the bundle 
and make a loose multi-loop bow toward the spines.


Love it!

I had so much fun creating this one, 
I made a couple other themed ones and placed them in my shop :)


If you enjoy ed this post you may like these

Tuesday, December 3, 2019

Shop Sale!

Two Shops ON SALE!!


Lots of goodies, don't miss out!


8bde3f301b639b67e4f9c5f8dcd6042cbe22e22a422b0f417f

Thursday, April 11, 2019

Easy and Quick Last Minute Easter Favors


Spring/Easter makes me feel like everything's new and fresh.
That's why I like to send my guests home from Easter Dinner with a plant.
It just seems right to me.

''To plant a garden is to believe in tomorrow''
Audrey Hepburn

So this year when my mind went to plants,
my pocketbook didn't follow.

I needed to think up a way to put together something inexpensive
so I could continue with my tradition.

I was at Walmart (what the heck would I do without that store?)
 perusing the garden section when I saw they had 6 packs on sale.
I grabbed a couple of Petunias 


and headed inside to find peat pots.


Once I got home I gave each peat pot a paint job in various Eastery colors.
While waiting for them to dry,
 I hopped on the computer to check out my Graphics.


Printed out some Easter Graphics
and once the pots were dry, glued them on


The next day I transplanted the Petunias into their own peat pots.
I tore a coffee filter up and placed a piece in the bottom of each pot to prevent the dirt from coming out but still allowing for complete drainage.


There ya go!
A buck a 6 pack, peat pots $1.59,
12 plant favors for under $4.00 ♥♥

And since the Petunias are in the peat pots,
the whole pot can go right into the ground.
Easy peasy for my guests too!


All ready for Easter Sunday 

.

.
Blog Widget by LinkWithin