Welcome to my
Perfectly Imperfect Life..........
Tuesday, June 20, 2017
Saturday, June 17, 2017
In the Garden with Pets
We seem to always have one or two in the bunch!
With Summer in full swing,
everyone is spending more time outside.
The last thing I want to find is my best friends
digging up my flowers.
Or stray cats leaving me "presents".
You don’t have to choose between your dog and your daffodils; keep both by adding a digging pit to your landscape ~ a spot where Fido can satisfy his urges without
destroying anything in the process.
A digging pit can be a simple depression, a wooden boxed area,
a child's wading pool...whatever suits you and your dogs needs.
You want to choose a good location your dog will want to use.
One of the reasons dogs dig is to have cool soil
under their bellies when they rest.
That means you need to place your pit in an area that gets shade,
at least during the hottest part of the day.
Pick a location where the ground will not become
waterlogged when you water the garden.
Make it the right size.
The pit needs to be about as wide as your dog is long,
and one-and-a-half times your pet’s length.
These proportions give the dog room to maneuver comfortably.
Next, do some training.
a child's wading pool...whatever suits you and your dogs needs.
You want to choose a good location your dog will want to use.
One of the reasons dogs dig is to have cool soil
under their bellies when they rest.
That means you need to place your pit in an area that gets shade,
at least during the hottest part of the day.
Pick a location where the ground will not become
waterlogged when you water the garden.
Clean up any debris if necessary
Make it the right size.
The pit needs to be about as wide as your dog is long,
and one-and-a-half times your pet’s length.
These proportions give the dog room to maneuver comfortably.
Once you’ve made your digging pit,
you have to convince your dog this is the one and only place to dig. While it may take time, it isn’t difficult.
First, bury favorite toys or biscuits your dog will
be happy to find in the pit.
Take your dog with you to the pit and
make a big show of digging.
Get excited and play with a toy you uncover.
After a minute or two of play,
bury the toy again while your dog watches.
Dogs will often dig where you’re indicating,
especially when they smell the toys or biscuits.
When that happens, praise the dog extravagantly
and play again when the toy is uncovered.
you have to convince your dog this is the one and only place to dig. While it may take time, it isn’t difficult.
First, bury favorite toys or biscuits your dog will
be happy to find in the pit.
Take your dog with you to the pit and
make a big show of digging.
Get excited and play with a toy you uncover.
After a minute or two of play,
bury the toy again while your dog watches.
Dogs will often dig where you’re indicating,
especially when they smell the toys or biscuits.
When that happens, praise the dog extravagantly
and play again when the toy is uncovered.
We gardeners don’t like finding “presents” left
behind by stray cats.
The worst!
There are solutions to this problem,
though it may take experimentation to
find the one that works best for you.
behind by stray cats.
The worst!
There are solutions to this problem,
though it may take experimentation to
find the one that works best for you.
Add a feline ''playground''.
Try adding a “kitty corner” away from your main garden,
off to the side perhaps, to keep the cats busy.
Fill this area with sandy soil, and plant around it with
catnip, mint, and grasses.
This will entice cats to remain in this location
instead of in the rest of your garden.
This is what has worked for me.
I've left a back corner grassy and added some catnip.
They like to slink down and hide in them too.
There's also an area of soft sandy soil for there convenience.
Look for deterrents.
Rue (Ruta graveolens) is a well-known cat repellent,
used through the ages to keep cats out of gardens.
(Some people develop a rash when handling rue, so take care.)
Commercial repellents have varying success.
Some cats flee; others don’t even acknowledge the products.
Many cats dislike the scent of citrus,
so try scattering citrus peel around your gardens.
Try adding a “kitty corner” away from your main garden,
off to the side perhaps, to keep the cats busy.
Fill this area with sandy soil, and plant around it with
catnip, mint, and grasses.
Once in a while one of ours goes out to enjoy that corner also :)
Or just visit the garden ;)
instead of in the rest of your garden.
This is what has worked for me.
I've left a back corner grassy and added some catnip.
They like to slink down and hide in them too.
There's also an area of soft sandy soil for there convenience.
Look for deterrents.
Rue (Ruta graveolens) is a well-known cat repellent,
used through the ages to keep cats out of gardens.
(Some people develop a rash when handling rue, so take care.)
Commercial repellents have varying success.
Some cats flee; others don’t even acknowledge the products.
Many cats dislike the scent of citrus,
so try scattering citrus peel around your gardens.
Get ‘em wet.
An automatic sprinkling device, called the Scarecrow,
releases a burst of water when anything moves in its coverage area. A quick spritz is sure to make Kitty think again about a future visit.
An automatic sprinkling device, called the Scarecrow,
releases a burst of water when anything moves in its coverage area. A quick spritz is sure to make Kitty think again about a future visit.
I tried the Scarecrow for Raccoons, it didn't work.
Maybe cats would be more skittish.
Don't get me wrong, I am definitely an
animal person and love them all.
I've probably had a wider variety than the average person.
Just some kinder thoughts, ideas, and tips to help
enjoy your garden more =)
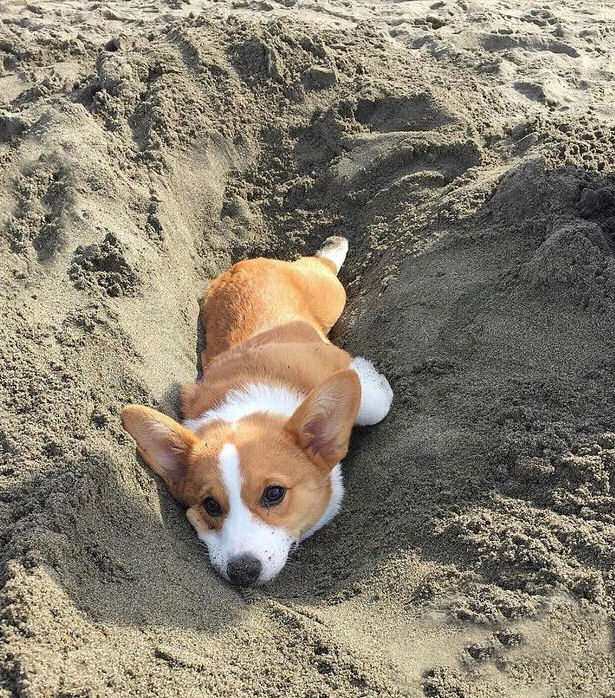
I opted for a sandy shaded area for ours dogs.
So far no more digging in the garden! YAY!
Bella enjoys it! ♥
Monday, June 12, 2017
Make Your Own Fragrant Massage Oil
Let's face it some days are just plain rough.
Whether it's stress or pain that has gotten you down a good massage will certainly help!
Especially one with your custom fragrance!
Ah, c'mon you can make beautiful fragrances, yes I said fragrances. Why have just one, when you can choose one that strikes your fancy on any given day!
Massage therapists often keep several different massage oils on hand for various complaints and personal scent preferences.
Whether it's stress or pain that has gotten you down a good massage will certainly help!
Especially one with your custom fragrance!
Ah, c'mon you can make beautiful fragrances, yes I said fragrances. Why have just one, when you can choose one that strikes your fancy on any given day!
Massage therapists often keep several different massage oils on hand for various complaints and personal scent preferences.
This recipe is enough for one full body massage.
Make up a custom blend on the spot,
or increase the amount of favorite blends
to have on hand.
Vitamin E - (Optional. 1-2 drops) An antioxidant, it helps prevent rancidity and prolong the life of your oils.
~ Choose 1 or more carrier oils: (2 Tbsp.)
Sweet Almond – Nutty aroma. The most popular oil for massage, it is light and thin, flows well on the skin and does not absorb too quickly.
Grapeseed – Very little scent. A glossy feeling oil, high in skin supporting compounds and great for balancing oily or combination skin.
Olive Oil Pomance – Affordable and odorless. Olive oil is known for improving and strengthening the skin.
~ Choose 1 or more essential oils: (6-12 drops)
Relaxing and soothing: lavender, sweet marjoram, relaxation blend
Clarifying and balancing: geranium, clary sage
Romantic and sensual: ylang ylang, sweet orange
Purifying and cleansing: tea tree, purify blend
Energizing and uplifting: peppermint, energize blend
Muscle warming: fir balsam
Directions
1. Pour 2 Tbsp. carrier oil(s) of choice into an amber glass bottle.
The 2 ounce size works well for this recipe.
3. To obtain a basic 1% dilution of essential oils, add 6 drops total. For a stronger 2% dilution, add 12 drops.
4. If you are making larger quantities to have on hand, add 1-2 drops of vitamin E oil per oz (or 2 Tbsp) massage oil that will be stored.
Pour a small amount of oil into your palms to warm it prior to the massage.
Massage oils also make very popular and appreciated gifts!
Labels:
essential oils,
health,
recipe,
stress relief,
tutorial
Friday, June 9, 2017
Happy Birthday and Father's Day Dad ~ I Miss You!
June 9th is my Dad's Birthday.
1919-2010
He flew PBY's in WWII.
After the war he became a carpenter
and did so until her retired.
What a little cutie!
About 4 yrs. old in this photo.
Our tradition to celebrate both his Birthday and Father's Day,
Here was our last time all together eating Sopas.
He turned 90 that year.
Dad and Cody in better times
Mom and Dad in later years.
So here's to you Dad,
Happy Birthday!
and Happy Father's Day!!
I love and miss you!
Give Mom a kiss and hug for me!
♥♥♥♥♥♥♥♥♥♥♥♥♥♥♥♥♥♥♥♥♥♥♥♥♥♥♥♥
And yes ~ JB Weld fixes everything!
Tuesday, June 6, 2017
Sunday, June 4, 2017
Grow Your Own Nutrient Packed Sprouts

With all the new studies out saying that micro-greens are the new nutritional power house, it's only natural to just on the bandwagon. After all, don't we all want to be as healthy as we can?
How long have we been adding sprouts to our salads?
I, for one, years!
But now there is a much more diverse variety to choose from and you can easily grow them right in your kitchen window.

The most common sprouts people are growing in their homes are: Adzuki
Alfalfa
Barley Grass
Broccoli
Clover
Fenugreek
Kale
Mustard
Pumpkin Seeds
Radish
Rainbow Chard
Sunflower Seeds
Watercress
Wheatgrass
Let me back up for a moment.
What are micro-greens?
They are defined as tiny leaves less than 14 days old. These greens can provide you with plenty of nutrients, possible more than their full size counterparts.
They make great salads or adding to green drinks or smoothies. They can be pricey in health food stores. There's no need to pay a small fortune for them. For the price of a few tubs of regular salad greens, you can grow enough Micro-greens to enjoy a whole seasons worth of salads, packed with top notch vitamins, minerals, and phytonutrients.
OK
Let's Grow Some Sprouts!
1. Place one teaspoon of small seeds into a clean jar and place about one cup of water inside. (If you're sprouting Adzuki beans, use about 1/4 cup)
2. Let seeds soak overnight or for at least 12 hours.
3. Place a piece of cheesecloth over the top over your jar and secure with a rubber band. Drain water from jar.
4. Rinse the seeds with clean filtered water, then place the jar upside down on an angle so the excess water can drain out easily.
5. Repeat the last step, several times a day until all of your sprouts have germinated and have started to grow.
6. You'll be ready to harvest your fresh sprouts in about 3 - 5 days.
7. When your ready to start harvesting, rinse one more time with filtered water, drain and store in an airtight container in the refrigerator for up to one week.

Happy Sprouting!

Subscribe to:
Posts (Atom)
.