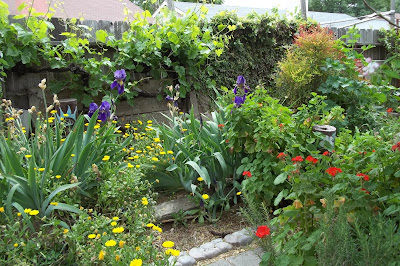
Now comes pruning ~ eeewww!
Welcome to my
Perfectly Imperfect Life..........
Monday, September 24, 2018
Make Your Own Grapevine Wreath
Does your grapevine look like a jungle plant?
It's just about time to prune back this grabby gal this Fall!
Well, dig out those clippers and let's get started!

It's just about time to prune back this grabby gal this Fall!
Well, dig out those clippers and let's get started!

After you've pruned your grapevine, lay all the vines out.
Remove all the leaves.
I'm leaving my leaves on due to the fact
it will end up being a large nest
(that's for future post)
not a wreath per se but, still needs to be made the
same way, so I thought I'd show you how I do it.
Remove all the leaves.
I'm leaving my leaves on due to the fact
it will end up being a large nest
(that's for future post)
not a wreath per se but, still needs to be made the
same way, so I thought I'd show you how I do it.
First, take a long, fresh vine and form a circle
in the diameter you want your wreath to be.
I want mine to be approximately the size of this log
(you'll see why in the upcoming post)
so I've started it on the top for sizing purposes.
Most likely you will have excess vine ~ wind this excess vine around the vine circle you just formed ~ using it as if it were wire/string, around the base, in and out of the circle. When the vine is to the end, tuck this end in between two wound vines. On the first round there might not be two wound vines to tuck the end into, so just hold the vine end until you can wrap around it with the second vine.
Now take another vine, insert the beginning end between two wound vines and begin the winding and ending process all over again. Keep adding vines and repeating this until the wreath is the thickness/size you want.
cording, string, whatever you have on hand to hold it secure.
Sometimes the vines just don't want to seem to cooperate and need some persuasion. You can do this as you go or at the end.
When you have finished your wreath, lay it in a dry dark place for a few weeks until dry. Do not hang ~ your wreath it will dry misshapen.
Your's won't have leaves, it will look like this one I made a few years ago.
These wreaths are fun to give as gifts ~ as they are or decorated with ribbon, dried flowers or whatever else you like. You may use a glue gun or wire to attach your decorations to the wreath.
Your's won't have leaves, it will look like this one I made a few years ago.
These wreaths are fun to give as gifts ~ as they are or decorated with ribbon, dried flowers or whatever else you like. You may use a glue gun or wire to attach your decorations to the wreath.
I have different plans for this one. It's still "drying" in the garage from last Fall. Yes, I'm sure it's completely dry and ready for the next step. One of these days I plan to have time to finish it!
Pin for this Fall!
Sunday, September 23, 2018
Monday, September 10, 2018
Mermaid Garden
It maybe Fall but with temps in the high 90's
it's hard to think of it as a seasonal change yet.
This project came right after The Fairy Garden.
Still craving the beach and adding to my Mermaid Deck,
I thought "Why not a Mermaid Garden?"
I dug through my Treasure Pile and came across
this tin box from Dad's Shop.
Yes, I still have lots of Treasures from the farm ♥
Thought it would be the perfect size for what my end vision would be.
Deciding to paint it instead of leaving it au naturale.
I used Rust-oleum American Accents in Gloss Seaside.
It came out beautifully, if I say so myself!
One thing I planned to do differently from the Fairy Garden
was to use ALL faux plants. I knew I wanted shells, sand,
beach glass and other small beach paraphernalia and didn't want
to take the chance of them being dislodged by watering.
I filled about 3/4 of it with styrofoam, added soil to fill in the gaps,
then started my decorative top/
I draped a piece of netting I found over the inside of the lid,
which stayed open on it's own. :)
There's faux air plants, seaweed, seahorses, a small mermaid,
a dinglehopper (oh YES! my baby fork embellished with rhinestones)
along with other ocean inspired bits
entwined in the netting.
On the left ~
coral (from Miami Beach), starfish,
sea glass (from Jewel Beach in Kodiak),
shells (Miami and Kodiak), baby seahorses,
a dried lotus I stuck Dad's iridescent marbles in,
faux plants, and a pretty under the sea castle.
On the right ~
A gorgeous Mermaid I happened upon at Hobby Lobby
(yes, I know she's too big, but it was love at 1st sight - what can I say -
the heart wants what it wants. LOL
She sits upon a piece of wood with real moss attached
my sister brought back from one of her treks -
perfect divider between ocean and beach, don't you think?
Faux plants, a sand castle,
beach chair (from one of my Birthday Cakes!),
white sand (Miami), and shells (Miami and Kodiak)
dot the beach.
I know I crammed a lot, probably too much,
but I love it!
Another piece of my beach fix til I get there ;)
Piese de resistance!
Says it all!
c'est fini
Sunday, September 9, 2018
Subscribe to:
Posts (Atom)
.


