Welcome to my
Perfectly Imperfect Life..........

Saturday, May 12, 2018

Seashore Coloring Pages


Print out 
and
Color away your stress


Monday, May 7, 2018

Scatter Kindness ~ #sktrkndns ~ WW


Started hiding last week, 
will continue through this week. 

A local Kindness Rock Group

Friday, May 4, 2018

Fold Out Ironing Board Transformation


Growing up Dad had this cabinet hanging in his shop with small tools, 
products, etc. in it.  I always loved those little shelves.


I always thought it was just another cabinet he had picked up along
 the way that he made into storage.  Being a carpenter, he was always bringing home odds and ends.

When we cleaned out the farm I asked my sister if I could have the cabinet. Of course, she said yes. I thought it would make a perfect Spice Cabinet.
It was made to be inset into the wall. I knew exactly where I wanted it to go. Since I have so few cabinets in my kitchen freeing one up from all those spices would be a great relief.

That's when she told me it was originally a fold out ironing board that came with the house and that Mom and Dad had removed it. I then noticed the burnt area down by air vents - that I had never payed attention to before. Not sure what the story was there, but understand now why it was removed.

I sanded it lightly and gave the outside a fresh coat of semi-gloss white paint.


I didn't want the door to be plain white on the inside, so I decided to paint it with chalk paint. I thought it could be a shopping list of spices I was running low on.


While the chalkboard paint was drying I covered the blue background inside with Krylon Hyacinth.


Once all was completely dry I conditioned the chalkboard paint by covering it in chalk


Then wiping it off with a dry cloth.


Ready for list


I had always wanted it to be inset into the wall, but after waiting 10+ years for someone with more know how to do it, I decided to just hang it on the wall.
I painted the sides the same green as the walls so they would blend in.


All spices transferred over with room to spare!
2 rows on each shelf in alphabetical order even!


Love it!

Final touch, my Dragonfly painting


So glad this is finally done. 
I am more than pleased with the outcome, 
especially with one less thing in the attic!

Tuesday, May 1, 2018

Happy May Day with Clever Me MemoVase ~ Review


 I was contacted by Splash Brands saying they were currently launching a new product that was unique.  I do like unique gifts, but how many times have I heard that?  But as Clever Me MemoVase was being explained to me, my interest was piqued. 

The Clever Me MemoVase is an 8" tall white ceramic flower vase with a detachable bamboo whiteboard.  You can write any message you'd like on the whiteboard with the dry erase pen that is included.


How cool is that!? The dry erase pen fits and stores behind the whiteboard. No more hunting for one to use!  When you're ready to change your message, it wipes right off with a dry cloth.


The magnets are nice and strong and hold the whiteboard securely. No worries about moving the vase and it falling off.


Isn't this the cutest thing? Perfect for Birthdays, Mother's Day, Weddings, Get Well's, and how about a sweet Hostess gift for all those upcoming summer BBQ's you'll be invited to?

Or just because.....

A lot of work went into the design of this perfectly pretty heart shaped vase.  A special ceramic mix and kiln technique was needed to finally reach the desired shape. The finish is so smooth also. Then to get the magnets just right.
It was in development for 3 years. 3 years of trial and error to get it the way they envisioned it. That's dedication! Plus it was made in the USA


I am so pleased Janine contacted me for this review.
Love this vase, I'm always bringing in flowers, so it will gets lots of use! 

You can get your own MemoVase on Amazon
Splash Brands are also on Facebook where you can follow them to keep up with their latest endeavors.!

 I received one or more of the products mentioned above for free or a 
discounted price from Splash Brands.Regardless,I only recommend products or services I use personally and believe will be good for my readers. 

Wednesday, April 11, 2018

Scatter Kindness ~ #sktrkndns ~ WW


A little late posting these photos
(yeh, they're pre-Christmas) :/


More hidden from Merced to Westley :)

UPDATE:

Before I could get this posted one was found! :)


Tuesday, April 3, 2018

Maxine ~ WW (kinda)

When guests come to visit,
I just put down drop cloths and say,
"We're painting."


Give me a sense of humor, Lord,
Give me the grace to see a joke,
To get some humor out of life,
and pass it on to other folks
.

Monday, April 2, 2018

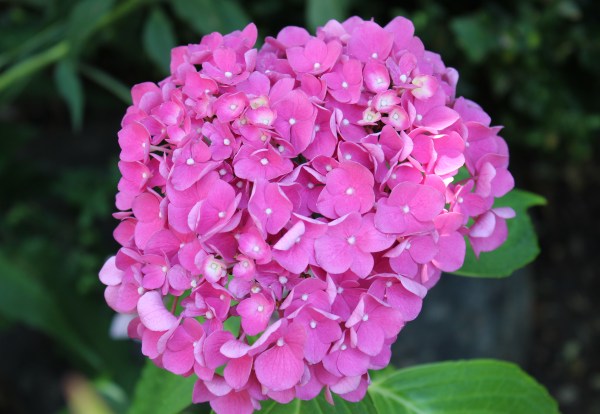
How To Dry Hydrangea Flowers


Drying Hydrangea Flowers is Easy!


Large showy hydrangeas are spectacular in the garden and even more so when dried and preserved. Knowing when is the right time to cut the flowers needs to be determined so they dry at their peak.


Dried hydrangeas will last a very long time and hold their color if they are kept out of direct sunlight.

Steps
1.  Examine the hydrangea flowers heads at the end of their blooming season. There are actually two types of flowers on each head. You will see that the larger flowers have a tiny flower on top.


2.  Wait until the tiny flowers on top have almost opened. The color will just have begun to fade. This is the prime time to cut them.


3.  Cut stems 12 to 18 inches down from the base of the flowers.


4.  Remove any leaves on the stems.


5.  Place the flowers in a deep vase filled with clear, fresh water. The stems should be submerged at least half way.


6.  Place the vase in a cool, dry area away from direct sunlight. You can enjoy the flowers during the drying process.
7.  Allow the water to evaporate naturally from the vase. Once the water is completely gone, your hydrangeas should be dry and ready for use in your floral arrangements/decorations or craft projects.


Tips
Cut the dried hydrangeas into small segments for use in craft projects.
Wire the small segments onto twigs, branches, or wreaths. You may also use a hot glue gun to attach them to floral arrangements.


Smaller flowers, segments or individual, can be used in potpourri.


Use to make dried arrangements. 


Give meaningful mementos special embellishments 


Such an assortment of colors!
Enjoy!


.

.
Blog Widget by LinkWithin