


I finally started and completed a project that has been waiting...oh...about 10 years.
Yes, I'm ashamed to say that!
The first project of the very beginning in my deck/backyard update.
I purchased these 3 folding chairs from a thrift many years ago along with another that was a different style (that I forgot to take a pic of).

At the time the wood was in pretty good shape and the green leather was and still is in great shape.
I pictured them with the original green leather seat
and the wood frames painted white.
Well, years passed - and passed - and passed -
you get the idea.
We used them as they were.
Eventually Mother Nature got to them
and did her thing.
The wood definitely needed help.
It had dried out and started to peel.

I sanded and glued what I could.
I was over the white painted wood frame,
besides the wood wasn't in as good of shape as it originally was.
So what do I always end up going to?
Mod Podge, of course.
I could use napkins to brighten them up.
Being on a budget, I didn't want to
spend a lot of money on napkins.
But in my minds eye, I could see more
colorful chairs. The napkins would
coordinate with the dark green leather seats.
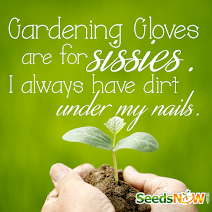
I took a chance and stopped at Dollar Tree.
A light shined from above!
There they were, perfect as can be!

Different colors - check
Colors that would coordinate with the dark green leather seats - check
Writing - check
Gardeny - check
$1.00 a package - WOO HOO
What more could I ask for?
All the things I had swirling in my mind,
but didn't think I would find in one
printed napkin I could afford.
Now to decide how many packages did I need?
Would the dinner or cocktail be better?
I ended up getting more than needed of each,
but better than running out!
I decided I didn't want matchy matchy,
so each chair got a different color:
mint, beige, pink, and blue.

Only the backs and back legs
received the napkin print.
I painted the whole chair
so each color shows through
the single napkin layer
that was added to the chair.
When you decoupage napkins you
remove the backing leaving the
single layer front, which is what you use.

It was really easy to do (my first time).
I put on the Mod Podge a section at a time,
then placed the image of the napkin
I wanted to be in that spot.

If needed I tore off the extra.
All the torn pieces come in handy for small areas
that needed to be covered.
Torn edges blend in better than cut.

Once completed, I went back and
added a few torn Butterflies
on top of the already decoupaged napkin
where I thought they were needed.

When done I gave it them couple coats of
Mod Podge to make sure they all had a good seal.

I love the way they turned out.
I can still fold them up with out scraping paint or napkin.
Speaking of pretty napkins,
anyone need some??


No comments:
Post a Comment
I'd love for you to leave me a comment. Helps me to know I'm not totally crazy...like my family thinks I am!
*hugs*deb