


There's no better time than winter to change up your bird feeders to bring some lively color to your gardens. The right combination of feeders and foliage can turn your yard into the songbird version of Grand Central Station!


Finding a Safe Place


Brush piles and evergreen trees and shrubs can provide safe hiding places while consuming seeds gathered at the feeder. Birds often grab a seed, and retreat to cover to eat it.
In colder climates evergreens near a feeder can provide the perfect option for giving birds a safe cover.


Finding a Safe Place
Finding the perfect location for a bird feeder is a balancing act between getting the views you want and birds’ safety. Ornithologists estimate that millions of birds are killed each year by hitting windows. Window strike deaths can be reduced by moving your feeders to within 3 feet of the window or greater than 30 feet away. When feeders are close to a window, a bird leaving the feeder cannot gain enough momentum to do harm if it strikes the window. If feeders are more than 30 feet from a window, the birds are less likely to perceive windows as a pathway to other parts of your yard. In short you can hang a feeder close to the house from the eaves, making it visible from a window. Or create a bird feeding/watching area further out in the yard.


Winter Cover for Your Yard
Most people often turn to bird feeding in Winter,
when plants have little or no dense coverage.
The plant community around your feeder is full of opportunity.when plants have little or no dense coverage.
Brush piles and evergreen trees and shrubs can provide safe hiding places while consuming seeds gathered at the feeder. Birds often grab a seed, and retreat to cover to eat it.
In colder climates evergreens near a feeder can provide the perfect option for giving birds a safe cover.

A strategically placed brush pile (dead or alive, tidy or wild) can also provide nice cover. Discarded Christmas trees make for a great base.

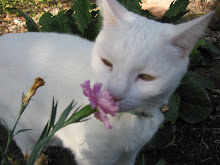
While at the feeder, birds are often out in the open, making them a target for local predators. A distance of about 10 feet from feeder to brush pile/shrub helps keep feeders out of a cat’s striking distance (even though they might hide behind the cover).


While at the feeder, birds are often out in the open, making them a target for local predators. A distance of about 10 feet from feeder to brush pile/shrub helps keep feeders out of a cat’s striking distance (even though they might hide behind the cover).


Easy to Make Pinecone Bird Feeders
Great activity to do with the kids.
Birds need access to nutrient-rich, fat-laden nuts, seeds, and even straight-up fat (like in suet). Consider making these easy to assemble pinecone suet feeders so your bird friends have enough energy to survive the winter. Unlike us, they actually need that extra helping of fat this time of year!
1. Collect Pinecones on your next walk through the woods or even your neighborhood.

2. Securely attach wire or sturdy string to the top of the pinecone.
3. In the meat section of your grocers, find a chunk of tallow (beef fat). How much you need will depend on how many feeders you are making. About one pound of tallow will yield about six small/medium sized pinecone feeders. Tallow is usually very inexpensive and one of the best forms of fats to feed to birds.

4. Slowly melt the tallow in a pan on low heat, you want the fat to melt so you can work with it. Do not overheat or overcook it.

5. In a large bowl pour in a thick layer of mixed birdseed.

6. Once the tallow is melted, turn it off and let it cool. Wait a few minutes until the tallow starts to become more of a glue like texture–not liquid and not solid. Then, pickup your pinecone by the wire and drag it through the fat. Be careful, the tallow is still hot. Move the pine cone around so it is thoroughly coated and some of the oil gets down into the scales.

7. Take the tallow covered pine cone and do your best to sink it in the bird seed. Sometimes it helps to sprinkle seeds over the pinecone. Do this before the tallow hardens.
8. When you are done. place it on a piece of wax paper and let cool completely. Once it's hardened it's ready to hang!

9. If you are unable to get pine cones, follow the steps above and instead of putting the melted tallow on pinecone, transfer it to a bowl of mixed bird seed. Thoroughly mix the seeds and tallow. Then, transfer the mix into a deep pan. Spread it out so it completely covers the bottom of the pan. Once it is hardened, you can cut out suet cakes. Wrap wire or sturdy string around them and they're ready to hang in your yard.